4.3 KiB
Configuration
Now you're logged in, it's time to configure your account as you want.
Click on Config menu. You have five tabs: Settings, RSS, User information, Password and Tagging rules.
Settings
Theme
wallabag is customizable. You can choose your prefered theme here. You can also create a new one, a chapter will be dedicated for this. The default theme is Material, it's the theme used in the documentation screenshots.
Items per page
You can change the number of articles displayed on each page.
Language
You can change the language of wallabag interface. You need to logout for this change to take effect.
RSS
wallabag provides RSS feeds for each article status: unread, starred and archive.
Firstly, you need to create a personal token: click on Create your token. It's possible to change your token by clicking on Reset your token.
Now you have three links, one for each status: add them into your favourite RSS reader.
You can also define how many articles you want in each RSS feed (default value: 50).
User information
You can change your name, your email address and enable Two factor authentication.
Two factor authentication
Two-factor authentication (also known as 2FA) is a technology patented in 1984 that provides identification of users by means of the combination of two different components.
https://en.wikipedia.org/wiki/Two-factor_authentication
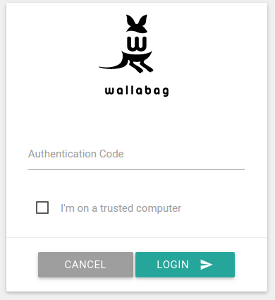
If you enable 2FA, each time you want to login to wallabag, you'll receive a code by email. You have to put this code on the following form.

If you don't want to receive a code each time you want to login, you can check the I'm on a trusted computer checkbox: wallabag will remember you for 15 days.
Password
You can change your password here (8 characters minimum).
Tagging rules
If you want to automatically assign a tag to new articles, this part of the configuration is for you.
What does « tagging rules » mean?
They are rules used by wallabag to automatically tag new entries. Each time a new entry is added, all the tagging rules will be used to add the tags you configured, thus saving you the trouble to manually classify your entries.
How do I use them?
Let assume you want to tag new entries as « short reading » when the reading time is inferior to 3 minutes. In that case, you should put « readingTime <= 3 » in the Rule field and « short reading » in the Tags field. Several tags can added simultaneously by separating them by a comma: « short reading, must read ». Complex rules can be written by using predefined operators: if « readingTime >= 5 AND domainName = "github.com" » then tag as « long reading, github ».
Which variables and operators can I use to write rules?
The following variables and operators can be used to create tagging rules:
| Variable | Meaning | Operator | Meaning |
|---|---|---|---|
| title | Title of the entry | <= | Less than… |
| url | URL of the entry | < | Strictly less than… |
| isArchived | Whether the entry is archived or not | => | Greater than… |
| isStared | Whether the entry is starred or not | > | Strictly greater than… |
| content | The entry's content | = | Equal to… |
| language | The entry's language | != | Not equal to… |
| mimetype | The entry's mime-type | OR | One rule or another |
| readingTime | The estimated entry's reading time, in minutes | AND | One rule and another |
| domainName | The domain name of the entry | matches | Tests that a subject is matches a search (case-insensitive). Example: title matches "football" |